Note: This page was translated by AI from the Japanese original. In case of any discrepancy, the Japanese version shall prevail.
Original post date (Japanese version): January 20, 2023
The Division of Analytical Electron Microscopy, IMR is implementing remote access for experimental equipment. Here we introduce the initiatives of our division.
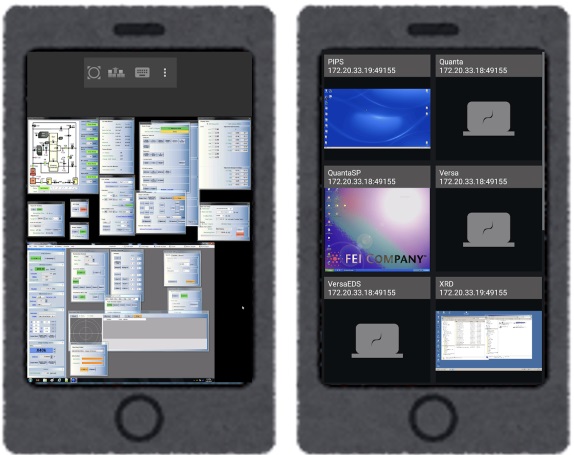
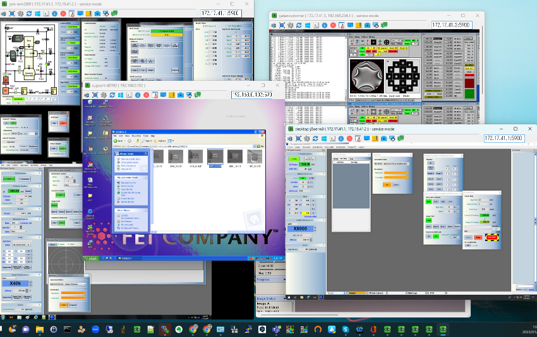
Background of Remote Support
- 2019 Started remote management (monitoring) of the JEM-ARM200F using VNC.
- 2020 Start of the novel coronavirus (COVID-19) pandemic ~
- Around February ~ Implementation of remote work, remote meetings, etc.
- April Started remote observation attendance for the ARM200F using a combination of a remote meeting system and VNC.
- Added JEM-2000EXII/EM002B to the targets.
- 2021
- November – December Added FIB (VERSA 3D/QUANTA3D) to the targets.
- 2022
- October Added DSC/XRD/Ion Milling (PIPSII) to the targets (mainly for remote management).
- Added JEM-2100plus to the targets.
- October Added DSC/XRD/Ion Milling (PIPSII) to the targets (mainly for remote management).
What is Remote Access?
Connecting to the management PC for equipment via the campus network or the internet to monitor and control it.
Benefits of Remote Access
- You can check the status of equipment in the laboratory from remote locations such as a lab room, office, home, or while on the go.
- During long measurements such as mapping, you can check the measurement status from the lab room or while out without going to the laboratory.
- Administrators can check the screen directly and give instructions to users on-site for troubleshooting during user operation. (It is often difficult to understand over the phone alone.)
- You can share the management screen of the experimental equipment with the outside (Remote Attendance Observation is possible).
- Sharing between the administrator and external users (remote attendance requesters).
- Sharing between the user and joint researchers.
- Example: A student communicates with a faculty member in the lab room while observing (operating) the TEM.
- Remote operation can be performed as needed.
Points to Note for Remote Access
- Security measures are required.
- It is often not possible to install security software on experimental equipment to ensure stable operation.
- Older OS versions may be used.
- Experimental equipment PCs without sufficient security measures are often not permitted to connect to the campus network.
- Installing security software may cause the PC to become unstable as an experimental device.
Rather than equipment manufacturers explicitly prohibiting network connections, it is difficult to universally guarantee operation while connected to a network, so equipment is usually delivered on the premise of stand-alone use. In other words, the stance is that if you connect to a network, it is at your “own risk” (and in some cases it may be explicitly prohibited). Domestic manufacturers seem to tend to avoid internet access on experimental equipment PCs more than overseas manufacturers do.
- Remote operation is limited.
- Depending on the network conditions, the response may become slow, or the connection may disconnect and not recover, so operation based on the premise of remote control is not recommended.
- Since there are many things that cannot be done remotely, such as inserting and removing specimens or operating physical switches, please go to the site if necessary (you may also give instructions to the on-site staff).
Building a Remote Access Environment
What You Need
- Relay PC (an old notebook PC is OK. However, the latest OS and security software are required)
- Additional network adapter (not required if the relay PC has multiple LAN ports)
- LAN cable / hub, etc.
Basic Concept
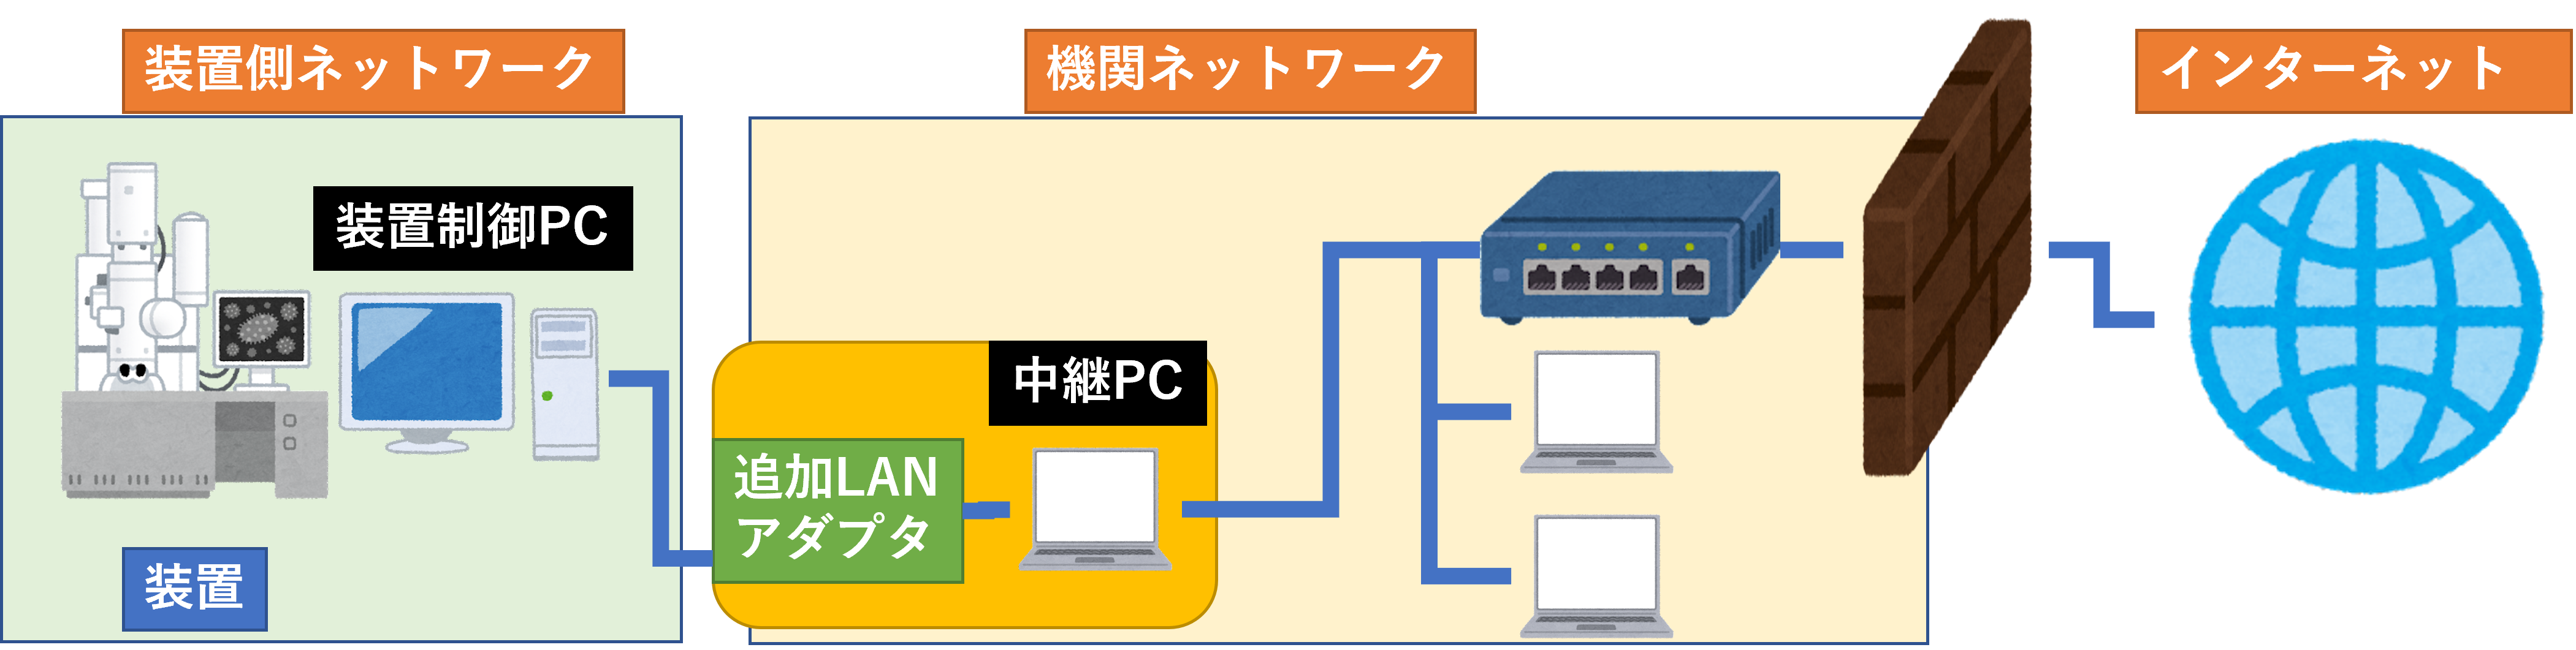
- The experimental equipment PC should hardly be modified.
- There is no need to install security software or a firewall.
- Older OS versions are acceptable.
- Install only the remote desktop software. (Required)
- Connect to the relay PC (do not connect directly to the campus network).
- Security measures are handled by the relay PC.
- Latest OS and security countermeasure software are available.
- Must comply with the connection regulations of the campus network.
- Configure connection permission settings from the outside (campus network/internet) as needed.
- If this setting is not made, you can only initiate a connection from the relay PC.
- It can be used for remote observation attendance, but it cannot be used for management from outside.
- If this setting is not made, you can only initiate a connection from the relay PC.
- Since remote desktop software itself may have security holes, security is ensured by restricting direct access to the equipment control PC exclusively from the relay PC.
- Use a VNC-type remote desktop software.
- Here, we use UltraVNC. (Compatible with Windows only)
Configuration and Operation Example
This section only shows the flow of the configuration and does not indicate specific values or detailed operation methods. Please set it appropriately according to the actual environment. In addition, please understand in advance that any damage or malfunction caused by implementing the methods on this site is not guaranteed.
- Connect the additional LAN adapter to the relay PC.
- Complete driver installation if necessary.
- Not required if the relay PC already has a spare LAN port.
- Connect the relay PC and the equipment control PC with a LAN cable.
- If there are multiple PCs on the equipment side and a network is already configured, connect it to a spare port on the existing LAN hub on the equipment side.
- Check the environment of the equipment control PC.
- Check the OS version.
- If a network is already configured, check the network information (IP address / network group).
- IP address settings (Relay PC / Equipment control PC)
- Assign IP addresses to the relay PC and the equipment control PC so that they do not overlap within the same network.
- Be careful not to change the institutional network side settings of the relay PC.
- Enable only TCP/IPv4 in the properties of the network adapter of the equipment control PC.
- Disable unnecessary protocols and services.
- If an existing equipment-side network is set up, change it only if you know what you are doing.
- Assign IP addresses to the relay PC and the equipment control PC so that they do not overlap within the same network.
- Software Download
- Download the latest version of the UltraVNC software from the UltraVNC site on the relay PC.
- Unzip the downloaded file and save it to a USB memory stick (to copy it to the equipment control PC).
- If the OS of the equipment control PC is old, the latest version of UltraVNC may not work. In that case, use an older version. (There may be security holes in the older versions, but since security measures are not taken on the equipment control PC itself, we ignore this and use it.)
- Use the latest version of UltraVNC on the relay PC.
- Software Installation (Relay PC)
- Install the latest version of UltraVNC (Viewer) on the relay PC.
- If necessary, you may install the Server or a repeater. (Pay attention to security)
- Software Installation (Equipment Control PC)
- Using a virus-checked USB memory stick, copy the UltraVNC installation file to the equipment control PC.
- Install UltraVNC (Server) on the equipment control PC.
- Start UltraVNC (Server). (Run it as a Service if necessary)
- Set the password for UltraVnc(Server). (There is one for View-only and one for remote operation.)
- Remote Desktop Connection
- Start UltraVNC(Viewer) on the relay PC.
- Enter the IP address of the equipment control PC and connect.
- Enter the password.
- The desktop of the equipment control PC will be displayed on the relay PC.
- Bonus
- In this state, if you connect to a web conference system (Zoom/GoogleMeet/WebEx/MSTeams, etc.), you can share the screen of the equipment control PC via screen sharing.
- Bonus 2
- If you want to check the screen of the equipment management PC from other PCs on the institutional network or from the internet…
- Connect to the relay PC via remote desktop. (Use the Viewer on the relay PC.)
- Run the UltraVNC Repeater on the relay PC and connect through the repeater. (Use the Viewer on an external PC, etc.)
- If you wish to connect from the internet, you will need to first connect to the institutional network via VPN, etc., so please consult with your network administrator.
- If you want to check the screen of the equipment management PC from other PCs on the institutional network or from the internet…
To Campus Users
- Campus users can use remote access.
- It is view-only and cannot be operated, but it can be used for checking the progress of long-duration measurements, etc.
- Please ask the administrator of each equipment for the access password and usage policy.
- Those who can access the campus network using SSL-VPN can also use remote access via the internet.
- For instructions on how to use it, please see here (campus only).
*This post was created by an AI agent.